27 August 2013

How I Plan My Week

There are only four of us in our house, but I still find it very difficult to manage schedules unless I stay super organised.  I have a few tools that I use to keep myself on track.  

The first thing I use is a year planner.  I like this one by Lollipop Designs.


It's colourful and fun.  It took me ages to find a year planner I like, because most of them seem to have been designed for offices, and are really boring.  I keep this planner on my wall in the kitchen, right next to the fridge.  I use highlighter pens to mark out school holidays, overseas visitors, and birthdays and I also try to colour code appointments for each person in the house. 


I also keep a diary, which lives in my handbag.  You can make your own using my instructions here.  I also really like this one by Mum's Office.


The thing I like most about this kind of diary, is that you can keep a detailed record of everyone's schedules.  

The only problem with keeping all the schedule details in my diary (and just the main events on the wall planner), is that I'm the only person who knows what's going on.  To fix this problem I use the absolutely brilliant week planner created by Jen at iheartorganizing.


You can download your own free copy here.  I love this idea, but I really needed more space for the diary section, and didn't need the "thoughts" section.  I ended up printing several copies of the page, then did some old-fashioned cutting and pasting (with my guillotine and sticky tape).  I added in a couple of extra horizontal sections in the week days and cut off the "thoughts" section.  I photocopied the finished page.  This week isn't very busy because it's school holidays, but this should give you an idea of how I keep track of my week.


I keep a stack of these on a clipboard and hang them in the kitchen right above the breakfast bar. I love this method of keeping organised.  It has minimised random bits of paper with shopping lists and meal plans hanging around the kitchen.  It also means we have no excuses for forgetting appointments.
read more "How I Plan My Week"

26 August 2013

Pantry Cupboards ... My Guilty Secret


I love being organised, but I have a few guilty secrets.  My secrets are those places in the house that are hideous, jumbled messes, that I desperately try to hide from everyone.  Except now I am going to share one of them with you.  Here it goes ...


Ghastly isn't it?  I don't have a lot of room in my kitchen cupboards and these two store the majority of my tins, jars, biscuits, and sauces.  It's pretty awful, but on the plus side, there are a few items stored in neat containers.

I started my organisation by pulling everything out and working out what really needed to stay in these two cupboards.  All the kids cups, bottles and plates were moved out.  Both my girls are older now, and we don't really use plastic cups and plates any more.  I also found a new home for a few of the larger items.

Once I'd worked out what really needed to be stored in the two cupboards, I went hunting for some neat storage containers.  I found these two handy items at Lakeland.


They're so neat and tidy, and were really well priced too.  I bought three of the clear baskets with the handle.  They fit perfectly on the top shelf.  I bought two of the faux rattan baskets (one for the girls snacks, and one for all the spreads).

The next step was to label all my containers and baskets.  I used PowerPoint to create a simple, colourful label.


I used two fonts to create these labels - Clipper Script Fat and Lithos Pro Regular.  I downloaded them both from a free font website.  I printed the finished labels, cut them out, laminated them and used double-sided tape to stick them in place.

Next up was tackling those ugly cupboards.  Since we live in a rented house, I can't go completely crazy.  I really like the idea of self-adhesive shelf liners, but nice ones are not readily available here in London.  There are two kinds of shelf liners available - hideously ugly ones, and REALLY expensive ones.  Taking ideas from Iris at The Colored Married Life, I decided to make my own shelf liners.

I hunted around the internet and found these very cool papers available for free download.  There was a great selection to choose from, they were easy to download, and printed very well on A4 paper.  The next step was the fiddly bit - I carefully trimmed the edges, and used double-sided tape to stick the sheets together.  Once I had a sheet the right size for the cupboard shelf, I carefully stuck a layer of clear adhesive film on top (just like covering a school book).  I then used more double-sided tape to stick the shelf liners into the cupboards.

Now that my shelves were lined, everything was labeled, and sorted into the correct storage containers, so I neatly put everything back into the cupboards.  Phew!  Here are the finished cupboards ...


And just incase you forgot how hideous those cupboards were, here are the before and after pictures.


It's an absolutely fantastic transformation.  Not only are the cupboards a pleasure to look at, I can now find everything I need.  I especially like those baskets on the top shelf.  I no longer have to get a chair to find a bottle of sauce from the back of the cupboard.  Now I just reach up, grab the basket, pull it down and pluck out the bottle I'm after.  It works so well - even for someone as short as me!

The next project is to finish the cupboard where all the containers of flour, sugar, and other baking supplies hide.  I think I need a cup of tea before I can even think about that.
read more "Pantry Cupboards ... My Guilty Secret"

23 August 2013

Easy Peasy Origami Crown

Our local craft shop was doing an origami workshop yesterday.  The girls both made some paper windmills and an origami crown.  They decorated their crowns with Washi Tape.  They both looked great, and the girls wore them all afternoon.


They were so easy to make.  All you need is some coloured paper and something decorative to make them extra special.  This is super easy origami.  Samantha managed to make one with some help, and Olivia made her's on her own.  Here's how to make a crown.

Start with 5-6 pieces of coloured craft paper, and cut them into squares.  If you have proper origami paper, you don't need to worry about cutting it into squares.


Start by folding the paper in half on the horizontal and vertical axis.  Crease the fold well, and then open flat.  Fold the top two corner points into the centre.


Fold the bottom flap up to meet the centre line.  Then fold it once again along the centre line.


Repeat these steps with each piece of paper.


Start joining the pieces together by sliding one piece into the next.  I also added a small piece of sticky tape to secure the two pieces of paper together and prevent them sliding apart.


Keep joining the pieces together until your crown is the desired length to fit nicely on your head (or whoever is going to wear it).  Join into a circle by slotting the last piece into the first piece and secure with sticky tape.  This step is fiddly, and make take a little while to get it to slide into place.


To help the crown take a circular shape I creased it along the fold line at each point of the crown.  You now have a crown ready to decorate.
read more "Easy Peasy Origami Crown"

20 August 2013

15 Minutes + Cardboard Box, Cardboard Tube and a Glue Gun

We got yet another delivery today, and yet another cardboard box.  The girls laid claim to the box pretty fast, and were busy piling supplies into it.  After a while they dug out a cardboard tube from my stash (I think it came from a roll of wrapping paper) and came to me with the usual question - "Can you make us something with these?"  Hmm ... a quick bit of thinking, and then out came the glue gun.


Hey presto ... cardboard castle.  Complete with second story and ladder.


Seriously, this took less than 15 minutes to make.  I just cut the cardboard tube into four sections.  Added some hot glue to each corner and stuck the "turrets" in place, cut two strips of cardboard and glued them in place to be the second story, and used a craft knife to cut out the door.  The ladder was made with four ice lolly (popsicle) sticks.  The last step was using a black marker to draw some detail on the door.  Cardboard rocks!
read more "15 Minutes + Cardboard Box, Cardboard Tube and a Glue Gun"

19 August 2013

Homework Boxes

Now that Olivia is heading into Year 4, we will be getting homework regularly.  Each week she has a spelling test, general knowledge test, maths homework, english homework, and other homework assignments.  To help with our organisation and routine, I made her a homework box.  I found my inspiration here, and knew it was just what we needed.

Study Box - iheartorganizing
I set aside some space on the dining room shelves to store two file boxes.  Samantha doesn't have homework yet, but she will probably start having some next year.  After a long search (I gave up finding something as pretty as the one above), I found these:


They are Laura Ashley boxes (the design is called Lori).  I got them at Staples (in London).  I've filled Olivia's box up with the study essentials: pencils, sharpener, eraser, pens and notebooks.  I haven't put anything into Samantha's yet, as I'm waiting to see what homework she is going to have.  The last step was to add some pretty labels.


Now we are all ready for the new school year.
read more "Homework Boxes"

18 August 2013

Homemade Tshirts To Go With Homemade Shorts

Olivia and Samantha LOVE their summer shorts (read about them here and here).  I thought it would be nice if they had some coordinating t-shirts to go with them.  I started with some inexpensive plain white t-shirts from Amazon.


I then used fabric pens and stencils to draw the main picture on the t-shirt.  These are the supplies I used.


The Stencil 201 book by Ed Roth is brilliant.  The front section is full of loads of different ideas for how you can use stencils, and the back section is filled with 25 high quality, reusable stencils.  For this project I used masking tape to hold the stencil in place on the t-shirt, and fabric markers to draw the picture.  I also used some scrap card inside the t-shirt to make sure the ink didn't go through to the back fabric.  The fabric pens I prefer are SetaSkrib.  You can get cheaper ones, but they don't last as well.

Once I had drawn the stencil image, I then used double sided iron on fabric adhesive (Vliesofix) and some fabric scraps to create bird silhouettes.  I tried using my machine to appliqué around the birds, but the needle got jammed.  My machine is still quite new, so I'm not sure if it jammed because of the fabrics, the needle or my inexperience.  In the end I did a tiny blanket stitch around the edge by hand.  It worked out really well.


Here's are a couple of close ups, so you can see stencilled appliqué better.


The t-shirts were a big hit, and have been worn several times already.  They've also been through the wash several times.  The ink hasn't run, or faded at all.  I didn't set the ink using the iron, because I've found that it can change the colour.  I just made sure it had dried for a couple of days before I washed it.
read more "Homemade Tshirts To Go With Homemade Shorts"

17 August 2013

Fabulous and Affordable Magazine Boxes

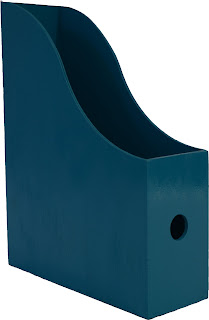
After the success of my mini drawers in the downstairs cloakroom, I decided to have another go at revamping a boring Ikea storage item.  This time it was wooden magazine file boxes.

Ikea Knuff Magazine File
Once again, I started by giving the boxes a light sand, then used spray paint to prime and paint them.  I also gave them a light sand in-between each layer, to ensure a smooth finish.  I used the same supplies as last time.


Once the boxes were painted, I wanted to add a word on the side of each, to show what was stored inside.  Unfortunately I don't own a Silhouette, so I had to do it the manual way. I created a PowerPoint  document with text outlines (the font is called Brush Script Std).


I printed the file on plain white copy paper, then carefully cut around the whole outline.  This took me quite a while, as I wanted it to be very neat.  I then used my Decoupatch glue to add it to the spine of the boxes.  I added a final coat of varnish to give them a durable, glossy look.


After I had finished, I realised I had left the dot off the top of the "i" in "drafting".  Oh well.

On another, slightly unrelated, note I was playing around with Photoshop and tried to edit my photos to make them clearer.  I'm not sure I've achieved this, because the boxes still look darker than they actually are.  I much prefer taking pictures outside, using early morning daylight, but it's raining today.  Instead I made a mini-studio in the dining room, but I was struggling with down lights and my flash just made things worse.
read more "Fabulous and Affordable Magazine Boxes"