25 September 2013

Library Book Bags

Both my girls love a trip to the library.  We try to go every weekend, but sometimes life just gets in the way.  Thank goodness our local library doesn't charge overdue fees on children's accounts!

I have been wanting to make the girls their own special library bags where they can store their books and also a notebook to keep track of books borrowed and due dates.  I had the ridiculous idea that if they had a pretty bag to hang on their door, the books would be kept there, and not get lost all over the house.  Thank goodness we write a list of the books borrowed, so I know what books to go hunting for before we head to the library.

I searched the internet and found a wealth of library book bags that people have made and blogged about.  I particularly liked this one by Mo Bedell on Sew Mamma Sew.  

The things I liked most about this pattern are:  it's pretty (always a good start), there is a special pocket on the strap to hold the library card, there is also a pocket for storing a notebook.  

The things I wanted to change were: the dimensions, the appliqué picture, and I wanted the bag to be fully lined. 

I used Ikatbag's incredible bag making tutorial series for tips on lining bags and making straps.  In particular I referenced her Darted Tote tutorial, Lined Flat Tote tutorial, and Reversibility and Other Magical Traits tutorial.

I started by mapping out a pattern.  I decided on the dimensions of the finished bag, and worked my way back from there.  This is what I came up with:


I also drafted a picture of a flower which I used to create the appliqué on the front of the bag.  

These are the two finished bags:


When I made these bags I wasn't planning to blog about them, so I haven't taken step-by-step photographs.  Instead I've made a list of the steps below:
  1. Gather your supplies - plain fabric for the main bag (I used a white denim - I think I should have used canvas, as the denim is too soft and slouchy), patterned fabric for the lining and appliqué details (I used two different quilting cottons), Bondaweb or similar product for the appliqué, a coloured hair elastic, a button.
  2. Cut out all the pieces using the measurements from the template.  
  3. Draft a feature picture, iron your patterned fabric to Bondaweb and cut out the image.  Iron the image to the 14"x10" outer fabric piece.  When working out the position of the appliqué, don't forget to allow for the 1.5" of fabric that will fold around to become the side and bottom panels of your bag.  Otherwise you'll end up having to unpick the appliqué and reposition it after you've already sewn up the whole bag (speaking from experience here).
  4. With right sides together sew the 14"x11" contrast fabric piece to the appliquéd piece.  Turn it over, iron and top stitch (Step 2 of Mo Bedell's instructions).
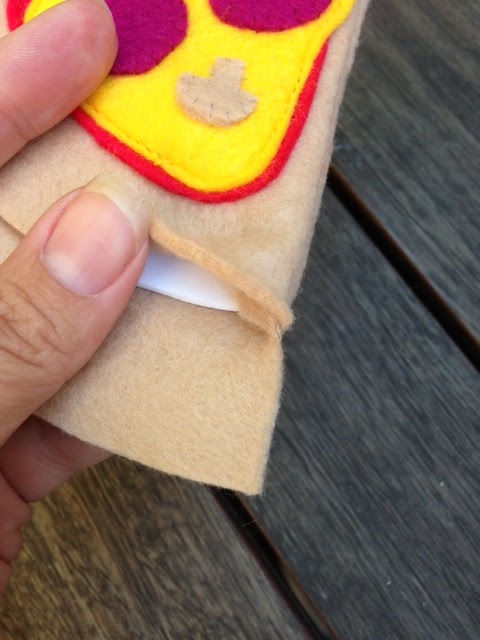
  5. Using Mo Bedell's instructions (Steps 7-10) sew the strap and library card pockets.  Leave the ends unfinished as they will be disappearing inside your lining later.
  6. Place your pocket on the right side of one piece of the 14"x14" outer fabric and baste 1/4" from the edge around the three sides of the pocket.
  7. With right sides together (pocket on the inside) sew the two 14"x14" pieces of outer fabric together to form a bag shape (don't worry about finishing seams neatly as they will be disappearing inside the lining later too).  Do the same with the liner fabric.
  8. Using Mo Bedell's instructions fold the bottom corners of the bag outer bag and sew 1.5 inches from the corner.  Repeat with the liner.  If these instructions make no sense, have a good look at Steps 4 and 5 of Mo's instructions.  The main difference is that I don't sew a French seam, because I am lining this bag.  I also used my pinking shears to cut off the excess fabric on the corners.
  9. Turn your outer bag right side out.  Pin the straps in place.  Take care doing this so that you have them the right way around, the pockets on the correct side and don't have a twist in the strap.  Slide the outer bag and strap inside the lining bag.  Line up the seams and pin.
  10. Sew around the edge of the bag.  Leave a 4-5" opening on the back of the bag for turning the bag the right side out. 
  11. Turn the bag the right way out through the opening.  Press the top edge of the bag neatly and top stitch all the way around.  This will seal the entire top edge of the bag, and also help to secure the straps.  
I'm not sure how much sense these instructions make, but if you reference Mo Bedell's tutorial and Ikatbag's tutorials it should be fairly straight forward.
read more "Library Book Bags"

24 September 2013

Labels, Labels Everywhere

Labels are brilliant.  They tell you what is inside something without having to open it.  They also take the mystery out of the contents of my pantry cupboards.  Much better than having to smell it, touch it, or taste it to figure out what the heck is in the mystery container.

I've got two favourite kinds of labels. The first are the permanent ones.


The second are the temporary labels - like you put on leftovers.


The temporary ones are easy.  Grab a role of Washi Tape, stick a piece on your container, write on it with a marker pen.  When you're done with the contents of the container, just peel off the tape and throw it away.  I use Washi Tape labels on all my leftovers.  They stay on in the freezer, and peel of easily afterwards.  Plus they add a bit of colour, which is always nice.


The permanent labels are a little more complicated, but not much.  I usually use PowerPoint to create my labels.  The thing that always takes me the longest, is choosing a colour that looks great once I print it.  I'm always creating fabulous labels, printing them, then realising the colours are too dark, or not what I was expecting.  Once I have the perfect colour, font, size and layout, I cut my labels and run them through the laminator.  I usually attach them using double sided tape.  Lately I have had more success using clear adhesive film to cover and stick labels to containers.  It doesn't tend to peel off as much as the double sided tape.


If you'd like a tutorial on making labels on your computer, there's a great one on iheartorganzing.

I've also experimented with stencils and spray paint.  I really like these because they are so bright, cheerful and clear.


I love how neat spaces look when everything is labelled.  I'm slowly working my way through cupboards, shelves and other storage spaces.
read more "Labels, Labels Everywhere"

21 September 2013

Pony Bead Bracelets

It's been a while since I last posted.  Once the girls went back to school, I fell into a lethargic heap and battled two colds in a row.  I finally got up this morning feeling a bit better.

Olivia has been badgering me to help her make some bracelets she can give to her friends.  She had some thin, silver elastic cord and a container of pony beads.  Long ago we had a bead kit with instructions for how to make a bracelet using these supplies, but we had managed to loose the instructions.  I did the usual Google search and found something vaguely similar which helped to get us started.

This is what we made:


It was actually very easy, once we had worked out how to thread the elastic correctly.  Here's how you can do it yourself.  You need a thin elastic cord and some pony beads.


Olivia wanted to make rows of matching beads, so we started by sorting the beads into groups of four.  We used a paint palette for holding the sorted beads.


The first step is to thread four beads onto the centre of your elastic.


You then thread the next four beads onto one end of the elastic.


Take the other end of the elastic and thread it through the four new beads (the blue ones in this picture) in the opposite direction.


Pull the elastic so that the beads line up together in their rows.  It's important not to pull the elastic too tight at this point.


Continue adding the four beads at a time and threading both elastic threads through in the opposite direction.  Don't pull the elastic too tight, or the bracelet will pull out of shape.  You can gently tighten the elastic at the end.


Once you have enough rows to fit your wrist (it shouldn't be stretched out when wearing) you can gently pull the elastic along the edges so remove the slack.  This is what the finished beading should look like.


To join the two ends of the bracelet together, thread the ends through the first row (the purple row in this picture) like this.


Gently pull the elastic until it is tight enough, tie a double knot, trim the ends, and thread the ends back inside the beads.


The finished bracelet.


Once Olivia got started she found this really easy to do.  It's definitely something a 7-8 year old could do without help.
read more "Pony Bead Bracelets"

07 September 2013

More Than 1,000 Page Views

Random Crafting Adventures passed the 1,000 page views count today!  I'm very new to this whole blogging thing, and I'm really pleased that so many people have stopped by to see what I've been up to.  Thanks to everyone who has been reading my random posts about organising, craft and sewing.  
read more "More Than 1,000 Page Views"

05 September 2013

Felt Pizza - Almost Good Enough to Eat!

One of Olivia and Samantha's favourite toys is their play kitchen.  They are regularly running restaurants, having picnics and cooking up a storm.  After being inspired by Ikatbag's felt doughnuts, I decided to make some more felt food.  I found a whole bunch of great ideas when I did an internet search, and got inspired by this:

Reflections of a Semi-Crunchy Mamma - Felt Pizza Tutorial
I think this is totally adorable.  I set about making a variation of this.  I used felt (red, yellow, burgundy and beige) and white foam sheets:


To make a pattern, I drew a circle on copy paper, cut it out, then folded it into six triangles and cut one triangle out for a template.


I made a template for all the pieces I needed.  The foam triangles have slightly rounded corners, and one of the pieces of beige felt has a longer outside edge (which will eventually become the folded over crust).  If anyone is really keen to make their own pizza, I can email this PDF template to them.


I cut six triangles of white foam, six triangles of beige felt in each size, six tomato sauce shaped red felt triangles, six cheese shaped yellow felt triangles, 12 small burgundy felt pepperoni circles, and 12 small beige felt mushrooms.  These are all the pieces you need to make each pizza triangle.


I began by hand sewing the mushrooms and pepperoni onto the yellow felt.  I then used the machine to sew the red tomato sauce layer to the smaller tan triangle, and then to sew the yellow cheese layer on top.


I then placed the appliquéd top layer on top of the larger beige base layer (right sides together) and sewed around two sides of the triangle.


I trimmed the point and turned the triangle out.


I then inserted the foam triangle inside the pizza.  To help make a neat crust I trimmed the extra felt from base layer of beige felt.  This is essentially the excess seam allowance, that you don't need on the crust flap.

Pizza with seam allowance on crust flap
Pizza with seam allowance trimmed off crust flap
I then pulled that extra edge flap over, pinned it in place and stitched it down.


The very last step is to trim the excess felt from the crust edge.


It's much easier to sew the edge down when there is some extra fabric, and then trim the excess afterwards.  You end up with a much neater crust edge.

Here's the finished pizza.


This has been a huge hit with the girls.  They play with it all the time.  I've also found that, even though I used inexpensive synthetic felt, it has held up pretty well.

If anyone out there is keen to make their own pizza, I did scan my templates before I tossed them out.  Just send me a message and I can email you a PDF.
read more "Felt Pizza - Almost Good Enough to Eat!"