21 March 2014

My Very Own Coco

A couple of weeks ago I received something very exciting in the post …


I was very excited to see Tilly's new Coco pattern, and couldn't resist ordering the printed copy.  It really has been beautifully put together.  The pattern has been printed on photocopy weight paper, and the instructions are in a lovely colour booklet, with great photographs.  So much better than tissues paper patterns, and diagrams.


On my first trip to Walthamstow I found a few knit fabrics, which I hoped would be suitable for some versions of Coco.


I decided to use the grey and black fabrics to make a 3/4 sleeve dress.  This is the look I was aiming for:


I started by measuring and marking my original pattern so that I could cut the front and back panels in two parts.


I then used my tracing wheel and tracing paper to transfer the pattern to the fabric.


This took me a few goes to get right, as I had to press really hard to ensure that the marks were clearly visible on the grey fabric.  I then cut out the marked pieces using my rotary cutter and cutting mat.


The first step in sewing the dress was to attach the black section to the grey section, on the front and back panels.  I used my overlocker to sew the pieces together, then pressed the seam down.  Unfortunately, this fabric isn't cotton, so I had to use a pressing cloth to ensure I didn't burn/melt the fabric with a hot iron.


After this, I followed Tilly's very clear instructions.  I sewed all seams using the overlocker, and it gave a really neat finish.  I did all the top stitching on the neckline, cuffs and hem using the stretch stitch on my sewing machine.  I decided not to use my twin needle for the cuffs and hem, as it didn't give a really neat  finish last time I used it.  Instead I carefully sewed two rows of stretch stitch.  I was surprised by how neat a finish I was able to achieve this way.


The final step was attaching the pockets.  I carefully measured and pinned them in place, so they were evenly spaced.  I then sewed the first pocket by just guessing where the stitches should go.  Hmm …


Dodgy, isn't it?  I decided to mark the second pocket with chalk before I stitched it, which resulted in a much more even finish.


This is the finished dress.


I think it looks fab.  I also love that chunky white necklace with it.  I think I need to make this dress a bit shorter though.  My plan is to halve the width of the black section.  I think this length is a tiny bit dowdy.  It's a lesson learned for next time I make a Coco (and there definitely will be a next time) - double check the measurement from shoulder to the hem before I cut my pattern!

I can totally recommend this pattern.  It's so easy to make - even for someone who hasn't sewn with stretch fabrics before.  You can't go wrong with Tilly's clear and easy instructions.
read more "My Very Own Coco"

20 March 2014

The Great British Sewing Bee - Week Five Recap

We are halfway through the Great British Sewing Bee, and there are six contestants left. After four episodes I've really got to know everyone left.  There's a nice bunch of contestants here, and they all seem to be quite different.


The Challenges 

1. Sewing from a Pattern

Sew a waterproof anorak (techniques include handling slippery nylon fabric, iron on seam sealing tape, attaching ribbing) in 3 hours.

The pattern was a simple bomber jacket style anorak made in a single layer of waterproof nylon fabric, with ribbing cuffs and waistbands, and raglan sleeves.  I tried to find a similar pattern on the internet, but there just didn't seem to be anything like that out there.  I have ended up taking two screenshots from the show so you can see what it looked like.

Image Source - The Great British Sewing Bee

There's not much to say about fabric choices on this challenge.  They were all shiny, waterproof nylon.  There was a bit of interesting colour blocking on some jackets.

The main difficulty of this challenge was that none of the contestants had sewn with waterproof nylon fabric before - let's face it, who has?  Apparently is really slippery and you can't pin it because that would put holes in it - not a great idea in a waterproof garment.  Contestants used a few different approaches to avoid pinholes in the garment - pinning in the seam allowance, using pattern weights, and (my favourite) using pieces of tape to hold the pattern in place.

Because the fabric slips and slides while you try to sew it, the contestants had to use a walking foot to control the fabrics, which most of them seemed unfamiliar with.  I've never used one either, but it's on my list of accessories I want.

The seams were also sewn in a very weird way - they were sewn with wrong sides together and seams on the outside, which were then sealed with an iron-on waterproof tape.  I've noticed this tape inside jackets before, but never seen it being used.  It was a very clever method for finish seams, but the contestants were given hardly any instructions on how to iron it, and most of them struggled.  You can buy the seam seal tape and waterproof fabric from Pennine Outdoor.  I believe this company was the supplier of materials for this episode.

Image Source - Pennine OurdoorWaterproof fabric, acrylic ribbing, seam seal tape

The final difficulty of this challenge was to use the very stretchy ribbing to make cuffs and a waistband.  The ribbing had to be stretched evenly and sewn carefully to avoid puckered seams.

For once, everyone did their best to follow the pattern exactly as it was written.  Even Tamara managed to avoid unnecessary flourishes.

The judges gave their most positive comments on:
  • Tamara's neat topstitching, properly secured seam tape, and overall good work.
  • Jenni's colour blocked fabrics, properly secured seam tape, but her topstitching wasn't perfect. 

Their most negative comments were on:
  • Heather's missing topstitching, puckered seams, and tape not fully secured.
  • Chinelo's missing topstitching.
  • Lynda's  unfinished collar, squiffy seams, and unfinished jacket.

The results from 6th place are Lynda, Heather, Chinelo, David, Jenni in second, and Tamara in first.

Image Source - GBSB Facebook Page

2. Alter a Basic High Street Item

Take a sleeveless white top and pieces of leather, and transform them in 1.5 hours.  

Image Source - New Look
The contestants were given a basic sleeveless, white, high necked top with a buttoned back in a heavy, double knit, jersey fabric.  They were also given a variety of leather in different colours and finishes.

Heather seemed a little too excited about the leather, and looked like she was ready to go bonkers.  As usual, there was a wide variety of approaches, although everyone made a revamped ladies top:

  • David cut out the front and made a leather wrap in two tones of blue.  He had trouble with the double sided tape and it stuck everywhere.  The top was actually looking quite nice until he went mad with a stanley knife and slashed it up.
  • Tamara turned her top back-to-front and added a yellow scalloped leather collar with reverse appliqué detail in a shiny blue leather.
  • Heather cut a sweetheart panel out of the front of her dress and added two rust coloured leather panels, ribbons, lace and buttons.  If she'd just stopped at the leather panels, it would have been a much nicer top.
  • Lynda seemed to be the most adventurous, and made a bustier with aubergine leather panels, bias tape trim and a gorgeous leather flower detail.
  • Jenni cut the back out of her top and replaced it with a scoop back in mauve suede, and added a leather necklace style trim on the front.
  • Chinelo made a one-shouldered top and added a leather and lace ruffle, and a leather and ribbon corsage detail.

The judges gave their most positive comments on:
  • Chinelo's clever cutting and neat work.
  • Jenni's really nice leather panel in the back.
  • Lynda's nice smooth lines and lovely flower detail.


Their most negative comments were on
  • Heather's additions of lace, grosgrain tape and floral buttons which Patrick didn't understand.  May felt she'd done a nice job with the suede, but had then gone a bit mad.
  • David's seams with tape stuck in them, and a confused and messy front. 

The results from 6th place are David, Heather, Tamara, Jenni, Chinelo in second and Lynda in first.


3. Sew a Showstopper

Sew a pair of velvet trousers to fit themselves in 6.5 hours.

David summed up this challenge for me when he said "who wears velvet trousers?"  It's certainly not a fabric that interests me, and I can't see myself ever making velvet trousers.  That said, it was interesting to see how difficult a fabric it is to handle.

Some of the challenges of velvet are the fact that layers of fabric creep as you sew them, which will result in uneven, puckered seams.  Lynda hand tacked her seams, and Heather used about 5,000 pins in each seam to avoid seam creep.  Any stitching will show on the garment, so topstitching is difficult, and unpicking mistakes will often show.  I also noticed everyone using scraps of velvet when pressing, to ensure they didn't damage the nap of the fabric.

There was a variety of appraoches used:
  • Heather chose a very simple pattern with an invisible zip.  She also chose a firm, easy to handle velvet.  Heather had experience sewing with velvet before.
  • Jenni chose a very 80s style highwaisted pattern with a cuff on the hem and a fly zip.  She chose a fluid, synthetic velvet, which gave her a world of trouble.  It was also her first time sewing with velvet.  Jenni was so busy reinforcing her waistband with layers of interfacing, that she sewed it on the wrong way around.
  • Lynda chose a classic straight leg trouser with a fly zip.  She'd only sewn velvet once before, but seemed quite confident.
  • David chose a chino style mens trouser with a fly zip.  He seemed to manage without too much trouble.  He had plans to machine sew his him, but decided to hand sew after advice from Patrick.
  • Chinelo chose a skinny leg trouser with an asymmetric peplum.  She works with velvet all the time and seemed quite confident.  Chinelo showed her technique for cutting the asymmetric peplum, and it was fascinating to see how it was done.
  • Tamara chose a capri trouser in a lightweight cotton velvet with a printed cotton contrast, and an exposed zip. 


The judges gave their most positive comments on:
  • Heather's trousers were well done, but the pattern was very simple.  There was a minor problem with uneven darts.
  • Lynda's trousers were neatly sewn, fit her well, had a flat waistband and invisible hems.  Her zip had one tiny pucker, but that was the only problem.
  • Chinelo's trousers fit really well, the peplum was interesting, and overall they were pretty good.  There was a minor problem with the hook and eye.
  • Tamara's very good fit and "smashing" welt pocket, although there was some seam creep, and the contrast fabric on the waistband was showing.
  • David's trousers were a good fit, darts were well pressed, pockets and fly were good, but there was some seam creep.  "Overall they are a perfectly wearable trousers" - lukewarm praise indeed!

Their most negative comments were on:
  • Jenni's difficult fabric, waistband sewn on the wrong way, fly not concealing zip and hems lumpy.


The Final Results

The contestants went off for a coffee, while the judges discussed the weekend's work.

Those in danger were:
  • Jenni - came 2nd in the anorak challenge, 3rd in the alteration challenge, but her trousers were a mess.
  • Heather - she came 5th in the first two challenges, and although her trousers were very good, they were the simplest pattern.

The contestants were then called back in to hear the final results:

Garment of the week went to … Tamara for her waterproof anorak.


The contestant leaving this week was … Jenni.


Final Thoughts

This week used fabrics that I haven't sewn with before, and probably wouldn't sew with myself.  It looked like an incredibly challenging weekend for the contestants, and really tested their skills.

We were given a glimpse of next week, which includes a baffling pattern challenge, altering an entire mens suit, and making overcoats.  I cannot imagine making an entire overcoat in a day, so this is going to be an incredible challenge.

Want to Read More About GBSB?

You might also like to check out these other blogs that have done some posts about this episode:

  • The Thrifty Stitcher - Claire-Louise Hardie is the Sewing Producer for The Great British Sewing Bee, and usually does posts about the patterns used in the first challenge on each episode, and also has some nice posts about techniques used.  She has just posted two stretch fabric classes (make your own leggings and Breton t-shirts) which will run later in March.
  • Little Black Duck  - Victoria Peat has posted some great links to tutorials that cover some of the techniques you can use to make your own GBSB inspired pieces.
  • Mighty Mighty Monk Seal - Steve & Chris present a very witty recap, which is written as fans of reality television review, rather than as sewers themselves.
  • Stitch Craft Create - Jen write a short recap each week.

    If you know any more blogs with interesting recaps or useful advice related to the GBSB, leave me a message and I can include a link.
    read more "The Great British Sewing Bee - Week Five Recap"

    19 March 2014

    A Pint Sized Sleeping Bag for Peanut


    Samantha continues to be absolutely crazy about playing with her doll Peanut.  Last year I made Peanut a baby carrier, as well as an assortment of dresses and nappies.


    This time Peanut needed somewhere to sleep.  Recently I've seen quite a few posts showing dolly sleeping bags, and I thought they looked really cute.  I hunted around for a nice simple tutorial, and couldn't find exactly what I wanted.  In the end I just had a go at coming up with a pattern myself.


    Incase you are wondering about the clashing fabric combination, Samantha chose the fabrics herself.  Olivia thought the dark purple trim was just what it needed for the finished look.


    Some of the things I learnt along the way were:
    • write down your measurements for each piece of fabric and cut them right the first time.  I was having one of those days where I kept cutting pieces too short and having to join fabric.
    • pin and check before your sew your fabric to the zip, otherwise you might end up with the zip on the wrong side of the sleeping bag.  The zip was supposed to be on the other side, but I couldn't be bothered unpicking it and start again.
    • buy a zip at least as long as the side of your sleeping bag.  If you don't, you end up with a  gap between the front and back at the bottom of the zip.  Which is why there is this little patch sewn on:

    • use wider binding to hold all those layers of fabric and wadding together, otherwise you end up having to hand sew one side of the binding.  It also means that any overlocking or other joining stitches are properly covered.

    If anyone out there is genuinely interested in me posting a proper tutorial of how I made this, please leave a message.  I've got to make another one for my niece, and I can properly document the process for you to follow.
    read more "A Pint Sized Sleeping Bag for Peanut"

    13 March 2014

    The Great British Sewing Bee - Week Four Recap

    We have reached the halfway point in the competition.  These are the sewers left:


    Most of these sewers seem very technically competent, and experienced.  Jenni and David are probably the least experienced, which definitely shows in the number of times they have faced elimination.  Heather, who early on seemed incredibly efficient and unfrazzled, found last week a real test of her skills.

    The focus this week was on sewing for children.

    The Challenges 

    1. Sewing from a Pattern

    Sew a pair of dungarees for a toddler (techniques include double rows of topstitching, flat felled seams, snap fastenings, dungaree clips) in 3 hours.

    Image Source - Impkids
    The pattern was a basic children's dungaree, with no pockets.  Contestants were asked to choose a sturdy fabric and were supplied with a range of cotton drill and corduroy.  There were some very cute fabrics available.  I especially liked the orange and white pig patterned cord Cerina selected, as well as the plain cords.  I also liked Heather's cammo print cotton drill, which would look so cute on a little guy.

    Everyone who used cord seemed to have no problem getting the nap to run in the one direction.  Cerina chose to use a thick, contrasting thread for her topstitching, however this made it even more difficult to sew, and every error stood out noticeably. Lynda had never done flat felled seams and had to spend time unpicking them when she sewed them in the wrong direction.  Heather, Tamara and Lynda seemed unfamiliar with dungaree clips, and Tamara put hers on back to front.  The snaps (poppers) on the waist seemed to give everyone the most trouble.  Heather and Chinelo needed a quick lesson from David, while Lynda didn't seem strong enough to secure them.  Tamara and Lynda had snaps fly off during the judging, and Heather had added hers back-to-front.  The toddler mannequins also kept falling apart, resulting in some scary decapitations and arms falling off, accompanied by Claudia declaring Chinelo should never have children.

    Heather was the only one who deviated from the pattern.  She made her own bias tape, and added it as a piping trim on several of the seams.  While it looked pretty, this resulted in her having to sew through five layers of fabric in some spots, which her machine struggled to do.

    The judges gave positive comments on:
    • Jenni's overall good sewing, neat hems, double stitching, good use of a contrast thread and perfectly matched back seams.
    • Chinelo's nice, even sewing, secure snaps, well executed flat felled seams, although her back seams weren't perfectly matched.
    • David's "good, solid, robust sew", which was what the judges were looking for.  His back seams were beautifully aligned, snaps were fastened strongly, his top stitching was neatly finished.

    Their negative comments were on:
    • Heather's unfinished hems (one of which Patrick though "looks like it was sewn with your feet"), snaps on back-to-front, but back seams were well done.
    • Lynda's flat felled seams not caught properly, missing double top stitching and snap falling off.
    • Cerina's untidy top stitching, flat felled seams not caught properly, and work not being neat and precise.
    • Tamara's snaps falling off, clips on backwards.  Also the addition of bias piping, which the machine struggled to sew though, was a nice idea but not necessary and took time away from perfectly finishing the garment.

    The results from 10th place are Cerina, Lynda, Tamara, Heather, Chinelo, Jenni in second, and David in first.

    Image Source - GBSB Facebook Page

    This is the first time I'be seen David really show just why he earned his place on the show, let alone still being here on the fourth episode.  He followed the pattern perfectly, and produced an absolutely perfect looking garment.

    2. Alter a Basic High Street Item

    Take a red child's sweatshirt, blue child's track pants and a plain white pillowcase and transform them into a dressing up costume in 1.5 hours.  


    David seemed to spend about half of the challenge trying to come up with an idea of what to make.  The red and blue seemed to flummox him completely.  Eventually he paired it with some red and black polkadot fabric and made a ladybird costume.  Heather and Chinelo made frilly, princess-ish dresses.  Tamara made a superhero costume for her niece Alice, Lynda made a Queen of Hearts costume, Cerina made a totally adorable pirate costume, and Jenni came up with an absolutely brilliant dinosaur, which involved a stuffed spiky spine and tail on the back of the top.  It was so fun.

    Overall there were good comments on all the costumes.  The judges gave their most positive comments on Lynda's lovely costume with a lot of different techniques used, Jenni's fun and really effective dinosaur, Cerina's brilliant pirate costume.

    Their most negative comments were on Chinelo's costume not fitting her mannequin, and Heather's fairy/princess costume that they were unsure about.

    The results from 10th place are Chinelo, Heather, David, Tamara, Jenni, Lynda in second and Cerina in first.

    Image Source - GBSB Facebook Page

    3. Sew a Showstopper

    Sew a prom dress for a teenager to fit a real model in 7 hours.

    This week's challenge gave the contestants a chance to sew for someone they know.  The models were daughters, nieces, and friends.  Everyone was surprised and delighted to see their models, and Cerina was so busy watching everyone else that she was totally startled to find her daughter standing right in front of her.

    Some of the techniques needed to do well in this challenge were the ability to fit a formal garment (most contestants choose to do a strapless dress), and many used boning and invisible zips.

    I wasn't a fan of David's shiny, slippery, sky blue fabric, which looked like it would be very hard to sew neatly.  Heather had a great combination of shot taffeta in magenta and orange, with sheer overlay skirts in matching colours.  Tamara had the best fabric by far with a brilliant blue printed neoprene, that she planned to use as a paper-bag skirt.

    David, Heather, Chinelo and Cerina all used invisible zips.  It was the first time David had used one, and he did a creditable job.  Chinelo's zip refused to close, and she had to unpick it and sew it again.  Patrick spotted Tamara's uneven pleats (fortunately at the pinning stage) and she started again.

    Lynda seemed to manage her time well and her model was already wearing her dress, while the rest of the contestants were running around trying to finish.  She even had time to whip up a little fabric corsage.  Chinelo was busy ironing her dress while her model was wearing it.  But the best last minute panic came from David, who stood his model on the table next to the sewing machine while he tried to sew the hem of the lining.

    The judges gave positive comments on:

    • Heather's effective layered overskirt, good fit on back, although there were a few minor problems (a bit loose on the front, zip not perfect).
    • Chinelo's lovely fit, good invisible zip, although Patrick felt the bow was a bit overpowering and was twisting the dress.
    • Lynda got the sexy music, that reminds me of a Marilyn Monroe movie, when her model entered so you knew it was going to be good. Her dress had a nice shape, great fit, interesting finish on the hem, and she even had time to make a cute corsage.
    • Jenni's good fit, nice buttons and rouleau loops, but Patrick felt there was too much fabric in the bodice and the dress was overwhelming the model.
    • Tamara's great fabric choice, nice shape, well fitted back, use of binding on hem, even pleats, however, her zip looked unfinished and the ragged ends were sticking out, and the front was a little loose.

    Their negative comments were on:


    • David's dress was too tight in places and was stretching, the lining hem was mangled, and May felt it was too tight to dance in - she even gave a dodgy demo of her groovy dance skills.
    • Cerina's dress was not finished (she ran out of time to make the overskirt), her hem stitching was showing, and her zip was not flat or neat.

    The Final Results

    The contestants went off for a coffee, while the judges discussed the weekend's work.

    Those in danger were:

    David - his dungarees were faultless, his ladybird costume came 5th, and his prom dress was too tight.
    Cerina - her dungarees came last, her fantastic pirate costume came 1st, but her prom dress really let her down.

    I was surprised that Tamara and Heather didn't rate a mention in the bottom.  Tamara came 5th in the dungarees, 4th in the refashion, and her prom dress was great.  Heather came 4th in the dungarees, 6th in the refashion and her prom dress did well.  David came 1st in his dungarees and Cerina came 1st for her pirate costume.  There seemed to be an equal mix of good and bad in the judges comments throughout the show, so I was surprised to hear there were only two contestants in danger.

    The contestants were then called back in to hear the final results:

    Garment of the week went to … Lynda for her Prom dress.  It was apparently closely contested this week, with about four others garments vying for top spot.

    Image Source - GBSB Facebook Page

    The contestant leaving this week was … Cerina

    Image Source - GBSB Facebook Page

    Final Thoughts

    I'm glad David stays on for another week.  I like that he is totally different from all the other contestants (and not just because he's a bloke).  I thought Cerina was delightful.  I especially liked her comments that she doesn't have sewing friends in real life, and that it was fabulous meeting so many other sewers. I hadn't really thought about it, but I'm the same.  Perhaps that's why I like to do a bit of blogging (reading and writing) - as a way of connecting with other sewers out there.

    Next week the contestants are apparently going to have to deal with the most challenging fabrics yet.  One of which will be … leather.  I've never sewn with leather, and I'm curious to see just how difficult it is.  We also got a sneak peak of contestants busy making trousers for themselves, including a few dubious looking inner seam fittings!

    Want to Read More About GBSB?

    You might also like to check out these other blogs that have done some posts about this episode:

    • The Thrifty Stitcher - Claire-Louise Hardie is the Sewing Producer for The Great British Sewing Bee, and usually does posts about the patterns used in the first challenge on each episode, and also has some nice posts about techniques used.  
    • Little Black Duck  - Victoria Peat has posted some great links to tutorials that cover some of the techniques you can use to make your own GBSB inspired pieces.
    • The Mighty Mighty Monk Seal - Steve & Chris present a very witty recap, which is written as fans of reality television review, rather than as sewers themselves.

      If you know any more blogs with interesting recaps or useful advice related to the GBSB, leave me a message and I can include a link.
      read more "The Great British Sewing Bee - Week Four Recap"

      11 March 2014

      Searching For Inspiration

      I recently had to drive out to Basildon (East of London) for a vet appointment for my dog, and had a couple of hours to waste while he was being treated.  I ended up in a little town called Leigh-on-Sea on the Essex coast.  Leigh-on-Sea is home to a lovely fabric shop called Belle Fabrics.

      Image Source - Google Maps

      Incase you are interested, their contact details are:

      Belle Fabrics 
      4-12 Elm Rd, Town Centre
      Leigh-on-Sea SS9 1SN
      01702 474115

      I was really impressed by their range of fabrics and haberdashery.  I bought three different fabrics while I was there.  I've got plans for one of them, but the two others were spur of the moment purchases.  This is what I bought:


      They are both light-medium weight knit fabrics.  They would be great for tshirts.  At the moment I'm struggling to figure out exactly what kind of tshirt I want to make from them.  I bought 1m of each fabric.  I could make a basic fitted, 3/4 sleeve tshirt, but I think I want something with a bit more drape.

      If anyone out there can recommend any patterns I should look at, that would be brilliant.  In the meantime, I'm going to wash them both, and stare at them until I am suddenly inspired.  I sure hope that works!
      read more "Searching For Inspiration"

      10 March 2014

      Our Behaviour & Pocket Money System


      Like many parents out there, we have an ongoing chore getting our girls to behave.  We've tried a few methods of reward and behaviour management over the years.

      For a while we had success with Nigel Latta's Ladder of Certain Doom from his book "Before Your Kids Drive You Crazy, Read This."  There's also an iPhone app.


      I'm not going to explain it in lengthy detail, but essentially bad behaviour resulted in the bedtime being moved.  Bedtime could be earned back by doing a "good behaviour chore".   After a while we had to accept that it just wasn't working really well for us.  They kids didn't seem too bothered about losing some bedtime, and with homework, after school activities, dinner, etc we often forgot to send the girls to bed early when they had misbehaved.

      We needed a new method, and a motivation that really worked for our girls.  Something that does really motivate both of them is pocket money.

      I vaguely remembered reading a blog months ago, that talked about a behaviour chart/pocket money method that I liked.  I tried really hard to find the blog, but had no luck.  I ended up designing my own chart, working from memory.

      I started by drawing up a pretty chart using PowerPoint.  I listed all the good behaviours we were hoping to see down the side of the chart.


      We are having a lot of the same behaviour problems with both girls, although there are a couple of ones that are more of a problem with one girl.  In the end we decided to have the same chart for both girls.  It just seemed easier to do it that way.

      Each day the girls can earn either a cross, a tick or a question mark in each box.  Good behaviour earns a tick, bad behaviour earns a cross, and marginally bad behaviour earns a question mark.  At the end of the week we use the chart to work out their pocket money.

      This is the current week's chart in progress.  Today was a bit of a disaster!


      Both girls start the week with £5 pocket money.  Each cross on their chart costs them 25p.  Two question marks on one day, counts as one cross.  Question marks don't add up across days, they are only added up on the day they are put on the chart.

      On Sunday's we take down the week's charts and get out the bank.


      We then add up the crosses and question marks, and work out each girls pocket money.  I even made a cash book for keeping a record of each week's pocket money.


      So far I haven't seen a massive improvement in behaviour, but I do think it's motivating them to do better.  Hopefully they both keep improving.
      read more "Our Behaviour & Pocket Money System"

      06 March 2014

      The Great British Sewing Bee - Week Three Recap

      We're down to eight contestants and the challenge this week is stretch fabrics.   Given this is an area I'm keen to learn more about, and master myself, I was excited to see this episode.  These are our contestants for week three:


      The Challenges 

      1. Sewing from a Pattern

      Sew a pair of leggings (techniques include using an overlocker, sewing with a twin needle, calculating stretch to determine size) in 1.5 hours.

      Image Source - One Little Minute Blog

      The pattern provided came in three sizes.  One of the first challenges for the contestants was to calculate how stretchy their fabric was, and then choose the appropriate size so that the finished garment wasn't too tight or too baggy.

      Miranda at One Little Minute Blog gives this advice:

      If the fabric you want to use is very stretchy … you may want to subtract a bit of negative ease from your circumference measurements (Waist, Hip, Thigh, Knee, and Ankle) before creating your pattern so that your leggings end up tight, not baggy. For a minimally stretchy fabric (10-25%) I’d suggest subtracting 1/2″. For a very stretchy fabric (25-50%) I’d suggest subtracting 1″.

      My Pattern Designer and fabric.com have useful tips for how to calculate the stretch of your fabric.  I think the easiest method is to cut a 4"x4" square of fabric.  Lay it next to a ruler, pull it until you feel resistance (don't pull too hard), then measure the stretched length.  If the fabric now measures 6" (4" fabric + 2" stretch) your fabric has 50% stretch.  If the fabric now measures 5" (4" fabric + 1" stretch) your fabric has 25% stretch.

      I don't have a lot of experience with knit fabrics, but it seems to boil down to this: if the fabric is very stretchy cut a small size, if the fabric doesn't stretch much cut a larger size.

      There seemed to be a good range of stretch fabrics on offer in the haberdashery this week.  I especially liked the grey and black spotted fabric used by Tamara, the black shiny "Catwoman" fabric used by Julie, and .  Jenni chose a truly horrible plain mustard yellow, and Chinelo chose a floral print that looked like she had raided my wardrobe in the 80s.

      Stretch fabrics behave in very strange ways when you are sewing them.  There seems to be quite a knack to knowing exactly how much to stretch (or not stretch) a seam when you are sewing it, when to stabilise a seam, when to use stay stitching and how to get the fabric to not pucker or twist.  It seemed like a lot of the contestants didn't have a huge amount of experience sewing with stretch fabrics.  Julie stood out as one contestant who had worked with stretch, having sewed ballroom dance costumes for her daughter. Some of contestants hadn't even used an overlocker before (Cerina, David, Heather, Lynda all seemed unfamiliar).  It's taken me a while to get used to my overlocker, and know how to adjust the tension, so I can only image how difficult this part of the challenge was for those sitting behind an overlocker for the very first time.  Just threading one of those things can eat up half an hour.

      Using a twin needle also proved to be another difficult technique for the contestants.  David hadn't used a twin needle before.  Julie's fabric kept jamming her needle, and caused a very twisted and messy elastic waistband.

      This week Julie seemed to have learned from her first two "sewing from a pattern" challenges, and declared that she was going to follow the pattern it exactly.  Tamara planned to read the pattern from start to finish.  The only deviation from the pattern was Jenni, who sewed a "cheeky" patch pocket on the back of her leggings.  Unfortunately the pocket was badly sewn, and only made the leggings look worse.

      The judges gave their most positive comments on Tamara's good handling of patterned fabric, Lynda's good fit, flat waistband, even twin needle stitching as well as good handling of patterned fabric, David's good fit, flat waistband, flat twin needle stitching.

      Their most negative comments were on Julie's saggy bottom, baggy and twisted waistband, Chinelo's uneven fit, Heather's saggy bottom and uneven waistband, Jenni's baggy bottom (Patrick - somewhere to carry sandwiches??) and addition of a badly sewn pocket

      The results from 10th place are Jenni, Heather, Julie, Chinelo, Tamara, Cerina, David in second, and Lynda in first.

      2. Alter a Basic High Street Item

      Take a t-shirt and transform it in 1.5 hours.  

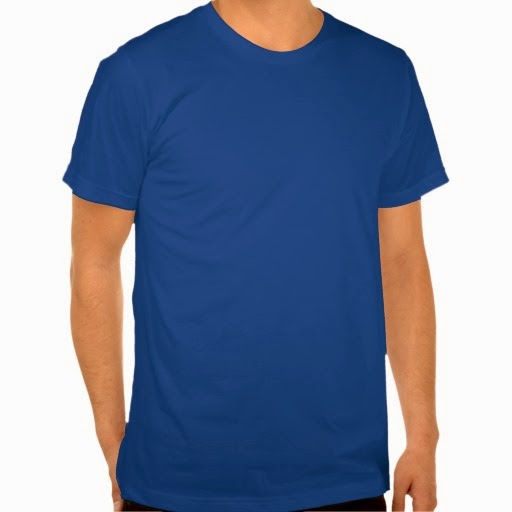
      The t-shirt provided was a large, basic mens t-shirt in a Superman blue.  There was plenty of fabric to work with, although the colour was really unappealing.  I found this very similar t-shirt available for sale on Zazzle (by the way, they call this colour Lapis - I suppose that's better than "unappealing").

      Image Source - Zazzle

      It's worth noting that there are quite a few tutorials and blogs out there recommend making t-shirts (especially for kids) out of an extra large mens t-shirt.  Keep your eye out for end of season bargains and thrift shop finds.  One main advantage of using a pre-made t-shirt, is that there are already neat, coverstitched hems. There is this absolutely brilliant video tutorial by Dana on Made, which takes you through the steps of making a kids t-shirt in this way.

      Julie cut her t-shirt in to a v-neck sleeveless top and trimmed with a ruffle in a printed cotton, Tamara quickly refashioned her t-shirt into a ruched, drapey high neck top and added a skirt in a red patterned fabric, Heather made a ruched, halter neck top with gaudy, ruffled neon pink trim and bows (if she'd just lost the ruffled trim, it would have been 100% better), David made a v-neck top using zips for the front opening (which just looked awful and tacky), Jenni made a one-shoulder top with a slashed and plaited feature across the back and some white zip trims, Cerina made a girls leotard with pink, sequinned trim, and Chinelo added a patterned knit fabric skirt to turn her t-shirt into a maxi dress.  Lynda seemed lost and uninspired, and ended up making a belted, sleeveless top.

      The judges gave their most positive comments on Cerina's great use of trim and total transformation, Julie's good colour combination and use of different fabrics, Heather's really good fit, ruching on sides and well sewn trim, Chinelo's great fit, neatly lined up seams, even sewing and joins in fabrics without pulling out of shape, and Jenni's good use of the plaiting technique without stretching the top out of shape.

      Their most negative comments were on Lynda's overly revealing armholes, Julie's over-stretched seams, David's poorly executed work and over-stretched fabric around the zips, and Tamara's over-stretched armholes and seams, and excess baggy fabric.

      The results from 10th place are David, Julie, Lynda, Tamara, Jenni, Heather, Chinelo in second and Cerina in first.  The reason given for Cerina's win was that her transformation was more dramatic than Chinelo's.

      Image Source - GBSB Facebook Page

      Personally, I disagree with this.  I think Chinelo's work was brilliant.  It looked fantastic, and was sewn perfectly.  Cerina's leotard was definitely a transformation, however, you could clearly see how untidy her sewing was on the armhole bias trim.

      3. Sew a Showstopper

      Sew a wrap dress in a stretch fabric to fit a real model in 5 hours.

      This is a great stretch fabric challenge.  It's challenges contestants to produce a well draped, fitted and flowing garment.  The wrap style also means contestants have to work really carefully across the fronts of the dress make sure it isn't pulled out of shape.

      The highlight of this challenge for me was Chinelo's choice of a slinky, purple stretch velvet,  Tamara's gorgeous print of red kisses on navy fabric with a red bias trim, Cerina's black and white spotty fabric.  The lowlight was Julie's choice of black stretch fabric and faux snow leopard fur, Jenni's retro style wrap dress with baggy "wizard" sleeves, and David using pattern pieces to mop his sweaty brow, and telling the world his wife has overly large hips (that man is in so much trouble when he gets home!).

      There were lots of minor hiccups along the way, with stretched seams and other problems, but a near disaster occurred when Heather sewed her skirt and bodice together inside out, using an impossible to remove triple-stitch, and ended up having to cut the two apart.

      The judges gave their most positive comments on Lynda's figure hugging dress and edges sewn without stretching, David's well executed neckline, neat fit across the back, and nicely worked faux wrap, Chinelo's great work with velvet, exceptional fit, and lovely appliqué detail, Heather's great work, especially considering her near disaster with the skirt sewn on wrong.

      Their most negative comments were on Heather's stretched edges, Cerina's excess fabric and gathers in places, Julie's baggy dress and stiff collar, Jenni's uneven neckline, waist seam not on natural waist and unattractive sleeves (which Jenni still loved, and called kimono-style).

      The Final Results

      The contestants went off for a coffee, while the judges discussed the weekend's work.

      Those in danger were:

      David - his leggings did well, his t-shirt transformation was a disaster, but his wrap dress really saved him.
      Jenni - her mustard yellow leggings with a "cheeky pocket" were a disaster, her t-shirt transformation was OK, and her wrap dress was not too badly sewn, but was a simple design.
      Julie - her shiny black leggings were poorly sewn, her t-shirt transformation came second last, and her wrap dress was ambitious, but just didn't fulfil the brief of a figure hugging wrap.

      The contestants were then called back in to hear the final results:

      Garment of the week went to … Chinelo for her purple velvet wrap dress.

      Image Source - GBSB Facebook Page

      The contestant leaving this week was … Julie.

      Image Source - GBSB Facebook Page

      Final Thoughts

      I really liked the stretch fabric challenges this week.  I was interested to see Heather struggle with her sewing, rather than seeming to be absolutely perfect in everything she does.  She certainly seemed more frazzled this week. I was pleasantly surprised to see David do quite well, although he really needs to pick up his game when it comes to the transformation challenges.  It was no shock to see Julie eliminated this week, but I think I'm going to miss her forthright manner and different take on things.  Last week I bought myself five different stretch fabrics, a Coco pattern from Tilly and the Buttons, and I'm really keen to keep improving my skills in this area.

      Want to Read More About GBSB?

      You might also like to check out these other blogs that have done some posts about this episode:

      • The Thrifty Stitcher - Claire-Louise Hardie is the Sewing Producer for The Great British Sewing Bee, and usually does posts about the patterns used in the first challenge on each episode, and also has some nice posts about techniques used.  She has just posted two stretch fabric classes (make your own leggings and Breton t-shirts) which will run later in March.
      • Little Black Duck  - Victoria Peat has posted some great links to tutorials that cover some of the techniques you can use to make your own GBSB inspired pieces.
      • The Mighty Mighty Monk Seal - Steve & Chris present a very witty recap, which is written as fans of reality television review, rather than as sewers themselves.

      If you know any more blogs with interesting recaps or useful advice related to the GBSB, leave me a message and I can include a link.
      read more "The Great British Sewing Bee - Week Three Recap"

      03 March 2014

      London Fabric Shopping - Walthamstow Market

      I first heard about Walthamstow Market from Karen at Did You Make That.  Since then I've read many blogs where they brag about their bargain purchases, and the huge number of fabric shops.  It was just too tempting, so last Saturday I took advantage of my husband being on childcare duty, and finally made a trip to Walthamstow Market.


      If you are going to head to Walthamstow, I recommend you check out this post on Did You Make That, and this handy map.

      Image Source - Did You Make That

      I took the train to Walthamstow Underground, walked through the Bus Station and started at the top of the High Street.  Some of the shops on Karen's map don't seem to be there any more.  These are the shops and stalls I found along my way:


      1. Textile Centre, 223-225 High Street, http://www.textilecentre.net
      2. Raihan, 149 High Street
      3. Beads & Buttons (haberdashery), 138  High Street
      4. Mateen Fabrics, 132 High Street
      5. Ribbons (haberdashery), 97 High Street
      6. Saeed Fabrics, 96 High Street, https://www.facebook.com/SaeedsFabric
      7. Hassan (haberdashery), 92 High Street
      8. Fabric Store, 80 High Street
       9. New Fabric Shops, 91 High Street
      10. Sai Fabrics, 70 High Street
      11. Hussain Fabrics, 52A High Street
      12. Random haberdashery stall (I saw at least two of these)
      13. The Man Outside Sainsbury’s, (directly outside) 112 High Street
      14. The Fabric Shop, 1 Vernon Road (closed until 4 March 2014)

      DISCLAIMER: Some of these shops were really hard to photograph as they were tucked in behind street stalls, mobbed by shoppers, or the sun was staring right into my lens.  Please forgive the slightly dodgy photos!

      A lot of the fabric stores had similar stock.  There was a large range of fabrics suitable for making a variety of asian women's wear (Indian, Pakastani, and middle eastern).  There were velvets, laces, embellished fabrics, metallic woven fabrics and so on.  There were lots of nice plain colours in cotton and synthetic fabrics.  I also found some nice printed synthetics, knits, cottons, broderie anglaise (I nearly bought some gorgeous white fabric for only £6.40 per metre).  There was some lovely swimsuit fabric at Saeed's Fabrics, as well as some very sweet children's printed cotton.  The Fabric Store (don't you love a shop name that gets straight to the point) sells fabrics from 50p-£3 per metre.  

      I really liked The Man Outside Sainsbury's, and bought a few fabrics from him.  I found lots more that I was tempted to buy, but I managed to behave.  My fabric pile is already large, and I want to finish a few projects before I add any more to it. 

      The haberdashery stores also had similar stock.  I was very impressed by Beads and Buttons.  The shop was well laid out, the range was big, and the prices were really low.  The quality of some items wasn't great (e.g. the bias tape was a very coarse fabric), but overall I was pleased and found a few things to add to my stocks.  Hassan had a similar range, but was very jumbled and messy.  I also liked Ribbons, and found some really short zips here that weren't available anywhere else.  Like Beads and Buttons, it was a neat, well stocked shop.

      So, what did I buy?  Here's my stash:


      At The Man Outside Sainsbury's I found these knit fabrics, which I've bought with an eye to making some versions of Tilly's Coco.  I haven't yet decided exactly what I'm going to do, but I think a grey and black dress would look nice.


      At Beads and Buttons I stocked up on zips for 20-30p each (the very small white ones on the top left were bought from Ribbons), bias tape for 70p each (the turquoise tape had already been used on my 30 Minute Skirt), elastic for £1, tracing wheel for £1, chalk for 40p each, chalk pencil for £1.

      I can definitely recommend a trip to Walthamstow Market.  I spent about £25 and came home with loads of great supplies.  I was really impressed with the prices and the range.
      read more "London Fabric Shopping - Walthamstow Market"