Showing posts with label Kids Craft. Show all posts

18 October 2015

Getting Crafty in the School Holidays - Modigliani Portraits


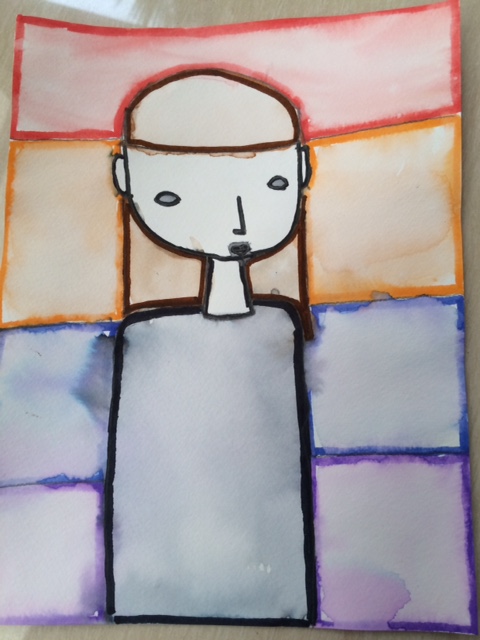
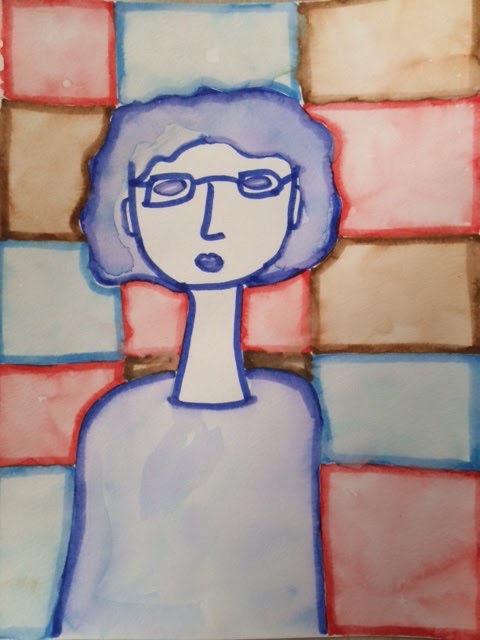
We enjoyed making Picasso Dogs so much, that we decided to have a go at making Modigliani Portraits using another Kids Art Week tutorial by Carla Sonheim.

Carla Sonheim has created six online art classes.  You can read about them and sign up here.


The Modigliani portraits were really easy to do, and looked fabulous.  Supplies needed are:

  • washable felt tip pens (I recommend the Crayola Supertips Washable Markers) - you want something that will bleed well when you brush over it with water
  • water colour paper
  • brushes
  • water
  • papertowel (for blotting your wet brushes)

We started by watching the tutorial, then we got straight into creating our portraits.  Here's a selection of our portraits that I managed to photograph before they were given to lucky recipients:


Samantha's grade 2 teacher - Miss Victoria

Olivia's grade 5 teacher - Mr Jonathan

Olivia's Mandarin tutor - Tien Laoshi

Olivia's self-portrait

Olivia's grade 4 teacher - Mrs MacDonald

My own self-portrait

We enjoyed this activity so much we did it a couple of times, including when a friend came over for a playdate.

It's not too late to sign up for Carla's online classes.  We had great fun, and would totally recommend giving them a go.
read more "Getting Crafty in the School Holidays - Modigliani Portraits"

07 October 2015

Getting Crafty in the School Holidays - Sun Prints


A couple of years ago I ordered a pack of Sun Print paper from an online UK craft supplier.  It got lost in the house (yes I have too many craft supplies!), but finally turned up this summer.


Incase you are not familiar with Sun Print paper, it is paper that has a surface which is sensitive to ultra-violet light.  To create an image, you place the paper on a flat surface, place an object on top that you want to create a silhouette of, expose the paper to sunlight, then you process the paper by submerging it in water.  The colours will continue to develop after you remove the paper from the water.

You can buy Sun Print paper from a number of companies, one of which is Sun Print.  There are a number of other suppliers listed on Amazon.

We waited for a bright sunny day.  Firstly we gathered a whole range of items to use for silhouettes.  The girls raided their rooms and craft supplies, and I picked a few things from the kitchen and around the house.  This is what we found.


Once we had everything ready, we set up a tray covered with a tea towel.  The girls took turns arranging items on a piece of Sun Print paper, then we took it outside to expose it to the sun.  Here's a picture being created:


Once you leave the page to dry overnight, the blue colours deepen and produce a lovely dark image:


As you can see, we made lots of pictures which are all in various states of colour development:


This was an incredibly easy activity, and both girls had lots of fun.  I think you could do this with almost any age child.  The Sun Prints website has lots of inspiration for older kids (or even adults), and want to make something a bit more artistic.
read more "Getting Crafty in the School Holidays - Sun Prints"

05 October 2015

Getting Crafty in the School Holidays - Picasso Dogs


We are coming to the end of two months of summer holidays, and have been keeping busy.  The holidays started with a family wedding (I drafted and sewed my own bridesmaid dress - I'll be doing a post on it soon) in France, and a visit to our family and friends in London.  It was so nice to see everyone.

Since returning to Singapore, we have been filling our weeks with playdates (lots of playdates), swimming, library visits, craft activities, and plenty of relaxing down-time.  Today Samantha had a friend over for a playdate and I decided that we would take advantage of a free online art class that a friend recommended.

Carla Sonheim has created six online art classes.  You can read about them and sign up here.


We registered for the online classes and began with Picasso Dogs.  Both my girls love art, and it's great when they have a plan to get them started.  I laid out the supplies required (paper, pencils, acrylic paint, paint brushes, water, palette and kitchen towel).  We began by watching the video, then the girls got started.

These were Olivia's paintings:


And these were Samantha's:


I even got in on the fun and made this one:


It's not too late to sign up for Carla's online classes.  We had great fun, and would totally recommend giving them a go.
read more "Getting Crafty in the School Holidays - Picasso Dogs"

17 January 2015

Getting Crafty in the School Holidays - Long Stitch


Samantha has been badgering me for ages to have a go at sewing a tapestry.  Olivia has been working on one for a while, and Samantha was keen to try it as well.  I had a look at Hobby Craft to see what kits were available.  All the tapestry kits were a bit big for a five year old, and I thought she would get bored with the endless little stitches. Instead I went for a nice long stitch by Anchor, with a picture of a horse on it.


I wanted to put the fabric in a frame, to minimise the chances of Samantha pulling the yarn too tight and causing the fabric to buckle.  I used a heavy piece of poster board and cut a hole in the centre, slightly larger than the image.  I then used staples and masking tape to secure it to the board.


I threaded a piece of yarn onto the needle, tied a knot in the end and showed Samantha how to get started.  She found it a little difficult at first to find the right place to poke the needle through from underneath, but after a while she was able to work on her own.  Some of the techniques I showed her included:

  1. Pulling the yarn until it is taut.
  2. Pinching the yarn and needle between your fingers as you pull to prevent the needle slipping off the yarn.
  3. Stitching from top to bottom across a section to fill in all the colour.
  4. Choosing which hole to sew through to follow the printed pattern. 
  5. Making sure you sew through the same hole where two colours meet, so there aren't gaps.

Here are a couple of shots of the work in progress.


She worked on it in bursts.  Sometimes she would fill in lots of sections in a day, then she would leave it for a week.  In the end it probably took her a month to complete the whole picture.

Once she was finished, I removed the tape and staples, and took the picture out of the frame.  I then trimmed it, and mounted it in a simple IKEA box frame.  Here's the finished picture.


I think she did a fantastic job.  She is delighted with the picture, and it is now displayed proudly in her bedroom.
read more "Getting Crafty in the School Holidays - Long Stitch"

03 January 2015

DIY Colouring Calendars for Kids


I was on Pinterest recently, when this very cute printable popped up.

Image Source - 1+1+1=1


There is a one page printout for each month of the year, with a cute colouring picture at the top.  I printed out a set for each of the girls and bought them an inexpensive clipboard from Popular (a big stationary shop in Singapore).  The girls set about colouring in the pictures with their new Christmas gel pens.  Once they had coloured the pictures, they set about highlighting holidays and birthdays.


Once they were finished, they hung the calendars in their rooms using some Command hooks.  This was a super easy craft activity, that kept them busy for a couple of hours.  It also required very little expenditure.
read more "DIY Colouring Calendars for Kids"

20 December 2014

More Christmas Crafts - Christmas Bookmarks


Woah … two posts in one day, after a nearly six month break.  What is going on??  I thought I better get this one out quickly, or Christmas will already be gone.

We have been getting into the Christmas spirit with some holiday crafts.  I was asked to come into Olivia's class and run a couple of craft activities.  I needed to come up with activities that were not too messy, could be easily done by a group of nine year olds with varying skill levels, and would produce nice results.  One of the first activities I thought of was the laminated bookmarks created by LiEr of Ikatbag.

Image Source - Ikatbag


I just needed to create some Christmas themed ones.  I'm not very good at drawing so I searched the internet for suitable Christmas images, printed them the right size and traced them.  This is my finished colouring sheet. (As always, I'm happy to email this to anyone who wants it.  Just send me a message.)


Each child coloured in a sheet of bookmarks using felt pens and pencils.


They then cut them out and laminated them.  They turned out beautifully and were a big hit with the class.


If anyone would like a copy of the bookmark PDF, please leave me a message below or email me at randomcraftingadventures [at] gmail.com.

Merry Christmas and happy crafting.
read more "More Christmas Crafts - Christmas Bookmarks"

19 December 2014

Origami Christmas Ornament


Hi Friends.  It's been a very long time.  We are now settled into our new house in Singapore, and I'm getting into the groove of school runs, activities, and also making new friends.  It's been a very busy time and I've been seriously neglecting the blog.

I have been pondering a post on organising an international move (or any move for that matter), and it will be appearing at some time in the future.  For now, let me share with you something that has been keeping me busy.

I was wandering through IKEA's Christmas display, when I spotted this cute little origami star:

Origami Star from IKEA display


When I got home I did a google search and found two terrific tutorials for folding German Paper Stars (also known as Moravian Stars).  There was a really excellent video tutorial by Lorraine Hebler and a photographic tutorial by Origami Resource Centre.  Using both these tutorials I have mastered the German Paper Star.    It's really very easy and makes incredibly cute Christmas ornaments.

With Christmas approaching, I wanted to make a cute (and inexpensive) gift for each of my girls classmates.  I decided to make each classmate a German Paper Star ornament.  The only supplies needed to make the stars were a pack of A3 paper, and some gold string.  I bought both of these from a local stationer for under $10.  I also needed some cellophane bags and some gift labels for packaging.

I started by cutting 1.5cm strips from the long edge of the A3 paper.


Once I had the strips, I randomly selected two colours for each star and started folding.


Slowly I made a pile of stars.


Eventually I had 50 stars.


I used my Cropadile to punch a hole in each star, threaded a gold string through each and knotted the ends.


Each star was packaged into a cellophane bag with a printed gift tag attached.


The girls have told me they were a big hit with their classmates.
read more "Origami Christmas Ornament"